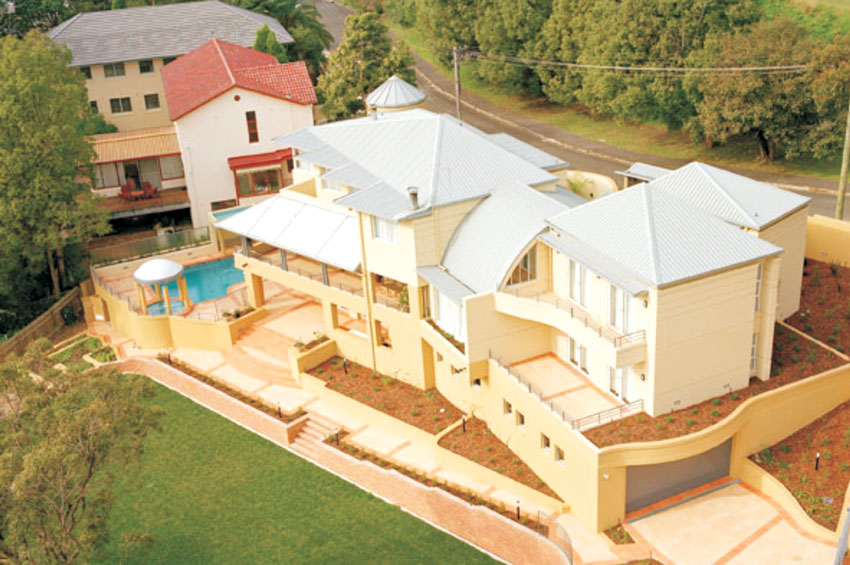
With the advancement of building techniques and the increased varieties of materials being used in the field of construction today, it is difficult to select the right kind of material that give styles and durability to your project altogether. Similarly, choosing the right roofing material is crucial for any building or construction project as there are a variety of roofing materials available. Some may only work as residential roofing materials while others would be better suited for office/commercial industrial buildings. It is essential that you make comparisons of roofing materials as your roof would be an important feature of the architecture of your home or office. If you have opted for a modern architectural style, metal roofing would, for instance, be your choice. Aesthetically, it comes in a variety of styles and colors to fit your personal preference and need. The article will let you know about the benefits of Metal Roofing and its installation on the Residential projects.
Metal roofing materials are a popular choice today as these are very versatile, durable, easy to maintain and cost-effective in long run. There is a growing list of reasons for the expanding use of metal in the roofing industry. A metal roofing system exemplifies how innovative thinking can use a proven product in an entirely new way.
Often one of the barriers to purchase a metal roof is the cost, which is two to three times that of a shingle roof. However, buyers who realize a metal roof is a one-time investment versus an ongoing, life-long expense understand the considerable value it offers. The cost of metal roofing varies with one's choice of metal but versions of such roofs are economical enough to fit comfortably into the average Indian user's budget.
Material for Metal Roofing
Metal roofs can be made from a variety of metals like tin sheets, copper, aluminum, zinc or stainless-steel sheets that are environment–friendly and recyclable. Each of these metals provides a distinctive aesthetic touch, and can be designed to suit various styles of roofing. Tin sheets are commonly used as roofing materials in Indian residential metal roofing, especially in structures where it is simply not possible to use concrete roofing.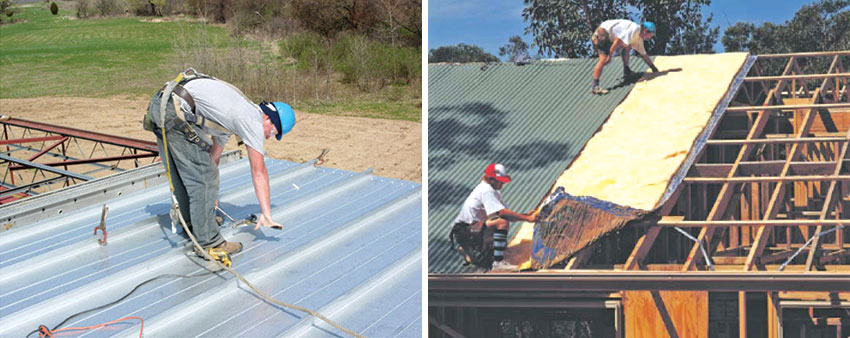
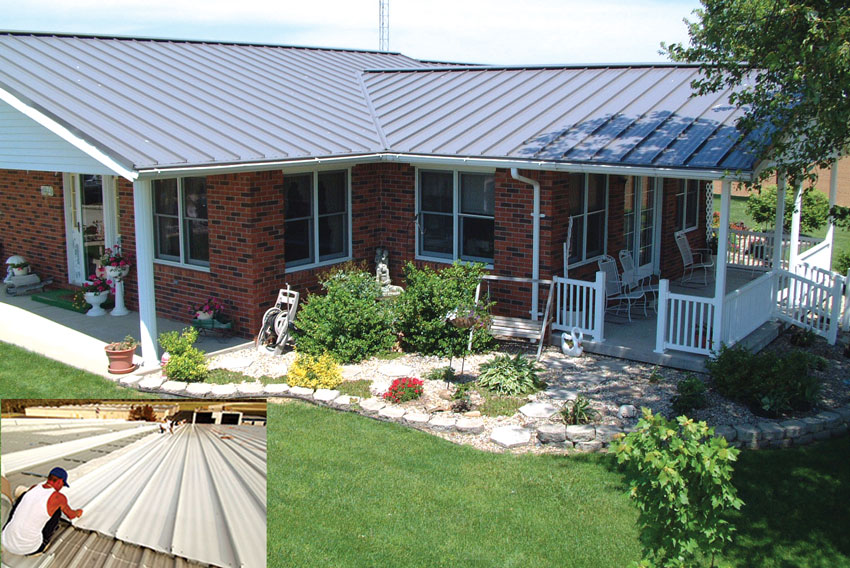
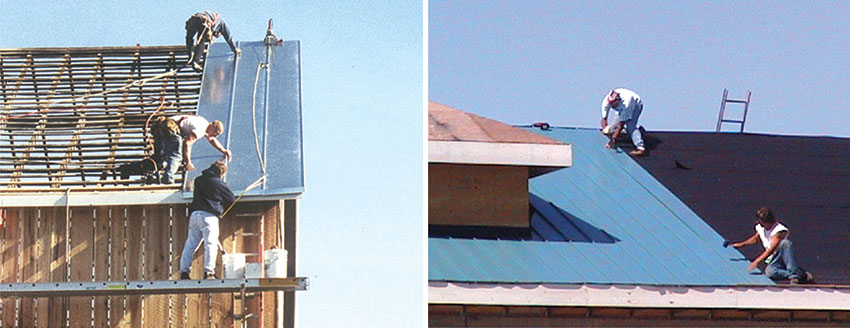
Long and wide sheets of a variety of metals are used to make metal roofing by bolting them together on wooden or metal frames at regular intervals. These sheets are also usually designed in such a way as to allow rain water to flow off them. While installing metal roofs, one needs not to worry about how to safeguard your roof from strong winds. These roofs are extremely sturdy.
Choose Your Metal Roofing
Metal roofing is growing in popularity these days. It comes in different types and a selection of colors. This allows you to choose the type best suited for your project. Whether you opt for a red roof, or prefer shingles, metal roofing can provide the look you want. Light colored metal roofing can reduce your costs of cooling by reflecting part of the sun's rays.Most types of metal roofing are easy to care for, and there is little difference other than the way it will look on your home. Choose your roof according to what you like and what will go best with the style of your house. Most experts suggest that it will be good for you to step away from the roofing materials in the showroom and look at them from at least twenty feet away. This gives a better idea of how the roof will look once it is installed on your home. As a metal roof has a life span up to fifty years so you should be very careful during purchasing material for roofing.
Metal roofing in New Construction: Metal roofing is ordered per each piece, whether it be in sheets, trims, or ridge material. When properly estimated, there is very little waste age of material in a new project. Sheets can be ordered and cut to exact lengths, allowing for less on the job cutting.
Metal roofing in Remodeling: Metal roofing is easily applied over an existing roof. Especially in situations where labor cost cutting is essential, the added value of not having to remove the existing roof material can be of a large help.
Advantages of a Metal Roof
The advantage of using metal roofing products is not limited to the fact that these have proven to be extremely long-lasting. Despite their sturdiness, metal is a comparatively lighter material to work with. Most metal roofing materials are available in the form of multi-shingle sections or sheets such as corrugated metal roofing sheets. These are quick and easy to install. If installed properly, a metal roof is not noisier than any other kind of roofing material. Typically, metal roofing is usually mounted over a solid substrate.In addition, a sound barrier is also provided by the insulation and the attic. If you are thinking of installing a metal roof over the roof you presently have, furring strips can be used to raise it above the existing roof. The air pocket that these furring strips create deadens sound even further.
Metal roofing is also considered to be fire-resistant, although resistance to fire also depends on the material beneath the metal sheets. Benefits of Metal Roofs in brief are as follows:
- Engineered for strength from 100% metal
- Special coatings process resists dirt and environmental aging
- Lightweight: less than 1/3 the weight of asphalt sheeting
- Metal Roofing Systems won't rot, crack, split, break or burn
- Environmentally correct - made from recycled material and are 100% recyclable
- Energy efficient
- Metal Roofing Systems come in many styles, colors and finishes to choose from
- Metal Roofing Systems increase your home/building's value
Installing a Metal Roofs
a. Materials and Tools Required for Installing Metal RoofingFirst, begin by collecting together the proper materials and tools that you will need for installing a metal roof. These are:

- A stepladder and an extension ladder
- A measuring tape
- A chalk line, including lots of orange chalk.
- A dependable electric drill along with three types of bits: a regular bit; a 5/16-inch bit for a screw head; and a ¼-inch screw head bit.
- Screws for the metal roofing: 5/16-inch lap screws made of metal and ¼-inch screws made of wood.
- A heavy-duty hammer and half a pound of 1 ¼ -inch sized roofing nails.
- About 10 pounds of 3-inch long head screws
- Snips, (KATI) used for cutting metal. These look like large scissors and have a straight edge. They are available at regular hardware stores.
- A nail bag made of cloth that you can wear in which you can put the screws while working.
Measure the Roof Height: Start by finding out how much metal roofing material you will require to cover the area. This can be done by measuring your roof's height and then adding whatever length of overhang you feel like having, somewhere between 2-4 inches is standard. You also need to measure the length of the roof as well as the height on either side to determine the amount of metal edging you will require. The roof can be measured by the slope factor method as well as the roof top method. You can measure trim pieces by total length, while square feet measurement is used for shingles. While measuring, ensure including about 3-6 inches of room in order to provide enough airflow space between each layer.
There are two basic kinds of metal roofing that are suitable for installing on residential homes: One is the R-panel metal roofing, which is available in panel types of sheeting which come with high ridges. You will need 5/16-inch screws in order to install these. The second type is known as the V-crimp roofing, which does not require the use of lap screws for installation, and hence are the simplest to install.
Remove old shingles and prepare a new base: Before installing new roofing, it is best to remove the old shingles. You can use a roofing shovel or a pitchfork to tear away composite shingles. Then you can create a base for the new roofing by spreading spread roofing felt or 30 lb tarpaper. If you have only a single layer of shingles on the roof, you can also use slat board as a base. These are pine wood boards used for building, measuring 1 by 4 inches, which can be fixed over the previous roofing with the help of 3-inch screws. These should be laid lengthwise, every two feet, starting from the bottom up to the top. The new metal roof then can be fixed on top of these boards.
Install the roofing sheet: Once you have the base ready, you can begin installing the metal roof. Begin by installing the metal edging, which will run all around the roof's perimeter. These can be nailed with 1 ¼-inch size roofing nails. If the metal roofing sheets are more than 12 feet in length, you will have to take the help of another person to get them up on the roof. If they measure less than that, all you need to do is lean them against the side of the building, and pull them up as required. You will need to place the sheeting from top to bottom, covering a section of the roof, as explained here.
Take a single metal sheet. Then using the ¼-inch wood screws made of metal fix the roofing into the wooden slats or bolt down a straight chalk line across the length at every two feet. These will act as your guides since wood screws will be fixed on either side, at a distance of every two feet.
The exception being for the first sheet, for which you need to fix the screws in its center as well as the inside edge, at a distance of every two feet. You don't need to into the outer edge of the metal edging, since you will be fixing trim edging there.
The next sheet will overlap the initial sheet. If a V-crimp is used, then a single crimp or dip of the top sheet will overlap a crimp of the bottom sheet. If it is an R-panel, one lip or ridge will overlap a ridge of the sheet that has already been fixed in with screws.
Repeat this process all the way over the roof until you are left with a last sheet. You need to measure the extra amount of space left over which goes past the edge of the roof on the last sheet. Then, cut all the way down, along this row, using the snips. Then fix in the last sheet. Then, repeat the process on the other side of the building.
After all the sheets are placed on either side of the building, you will need to fix in the 5/16 lap screws, if R-panels are used, which are put in at a distance of every four feet, at the place where there is overlapping of two metal sheets.
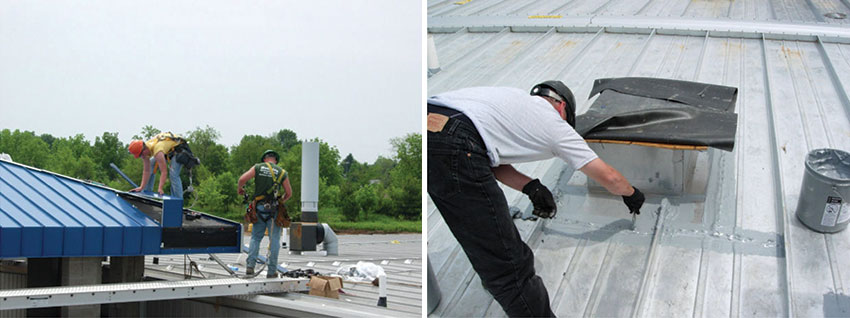
Installing the metal trim: Next, the metal trim has to be installed, covering the roof's sides along the edge, as well as the ridge or top peak of the roof. This will have to be notched in the middle so that it can be bent over the roof's ridge. The metal trims are fixed at a distance of every two feet with the ¼-inch metal wood screws.
Closures: Closures will also have to be put in if R-panel is being used. These are made of foam rubber, which are available in 3-foot lengths, and are designed according to the holes of the R-panel. These have to be pushed into the openings along the edge of the roofing in order to prevent animals and birds getting inside the ridges. The closures come with glue on their bottom side, which stick and self–seal when they are put in.
Next, the bottom of the sheets can be screwed down. If V-crimp roofing is being used, since no foam closures are involved, they can be screwed down the bottom while the sheets are being installed.
Then, the ridge will have to be done. If R-panels are used, they come with foam closures just like the bottom closures, the only difference being that this will be used to fill into the gaps on the top of the sheets. Hence, these need to be placed at the ridge on top of the sheets, so that the gaps are filled. Next, screw in the special metal ridge on the ridge using 5/16-inch metal lap screws, either for the V-crimp or the R-panel, at the high point were the R occurs in the R-panel sheets. This has to be done at a distance of every two feet on wither side of the ridge.
If V-crimp roofing material is used, the ¼-inch metal wood screws have to be used on either side of the Vs, at a high point, although not at the highest point. Again, fix these at a distance of two feet on both sides.
With this you have completed installing your metal roofing. You need to take proper precautions while attempting to install any kind of roofing. If the building is too steep, or the roof is difficult to walk on due to the angle or pitch of the roof, it is best to take professional help.
Challenges of Installing Metal Roofing
There are many challenges and possible dangers when installing a metal roof. Always be sure to read and follow the manufacturers' instructions carefully.- The steeper the slope of the roof the more difficult and dangerous installing metal roofing is.
- The edges of the metal are sharp and can cause a serious cut when improperly handled.
- Shards can fly off during installation and damage the eye.
- Each different piece must be placed exactly right, or the roof may not be structurally sound.
- The installer must be aware of the potential for expansion and contraction in the roof during times of heat and cold and install it with these factors in mind.


